In this article we will implement a mechanism using the email features in laravel framework to store the email templates into DB.
As we already know in order to create and send emails in laravel framework you have to create some sort of a mailable class and an associated blade view file. In small and medium applications this is convenient.
However for large scale applications developers usually think to process anything in a dynamic way it’s better to store those email templates in DB rather than in a filesystem. This is not an easy task as the email template can contain any arbitrary code.
There is different email templates that your application can send. For example your application can send static templates that contain just an html code. Also there is email templates that sent after user submit a contact form. Another type of templates when user finish registration in website and a welcome email sent to him. Also templates that contain more complex code for advertising purposes like ecommerce products and so on.
In this tutorial we will try to make a simple script to store the email templates into db. But again this might not be applied to any kind of emails with more complex php code and you should think to how to extend it if you can.
Requirements:
- Laravel 8
- Livewire library
The livewire library is a full-stack library for Laravel that makes building dynamic interfaces simple. It’s like Vuejs and Reactjs but using laravel and php code and supports many things like wire:model and events like wire:click. In order to understand this tutorial you should read the livewire docs at this link.
Preparing laravel & livewire:
First let’s install a new laravel 8 project:
composer create-project laravel/laravel:8.x.x dynamic_mailable --prefer-dist
Next go to the root dynamic_mailable directory:
cd dynamic_mailable
If you are in linux optionally you should run this command:
sudo chmod -R 777 storage
Install the laravel/ui package we will use it for auth scaffolding
composer require laravel/ui
Then generate the auth files & routes:
php artisan ui bootstrap --auth
Next install npm dependencies:
npm install
npm run dev
Now if you go to http://localhost/dynamic_mailable/public you should see the login links above the screen.
It’s time to install livewire:
composer require livewire/livewire
Publish the livewire config and assets with:
php artisan livewire:publish --config
php artisan livewire:publish --assets
For livewire to work as expected it’s preferable to make these updates:
Update .env file:
APP_URL=http://localhost/dynamic_mailable/public
Open config/livewire.php and change this:
'layout' => 'layouts.app2',
'asset_url' => env("APP_URL"),
This specifies the layout file to use with livewire, in this case it’s app2.blade.php. Let’s create this file below.
Create resources/views/layouts/app2.blade.php:
<!doctype html>
<html lang="{{ str_replace('_', '-', app()->getLocale()) }}">
<head>
    <meta charset="utf-8">
    <meta name="viewport" content="width=device-width, initial-scale=1">

    <!-- CSRF Token -->
    <meta name="csrf-token" content="{{ csrf_token() }}">

    <title>{{ config('app.name', 'Laravel') }}</title>

    <!-- Scripts -->
    <script src="{{ asset('js/app.js') }}" defer></script>

    <script src="https://cdn.tiny.cloud/1/no-api-key/tinymce/5/tinymce.min.js"></script>

    <!-- Fonts -->
    <link rel="stylesheet" type="text/css" href="https://cdnjs.cloudflare.com/ajax/libs/font-awesome/4.3.0/css/font-awesome.css"/>
    <link rel="dns-prefetch" href="//fonts.gstatic.com">
    <link href="https://fonts.googleapis.com/css?family=Nunito" rel="stylesheet">


    <style>
        .show-modal {
            display: block !important;
        }

        .invalid-feedback {
            display:  inline-block !important;
        }
    </style>

    <!-- Styles -->
    <link href="{{ asset('css/app.css') }}" rel="stylesheet">
        @livewireStyles

</head>
<body>
    <div id="app">
        @include('partials.nav')

        <main class="py-4">
            {{$slot}}
        </main>
    </div>

        @livewireScripts

        @stack('scripts')

</body>
</html>
Note the two directives i have added the @livewireStyles and @livewireScripts. The first one injects the livewire styles file and the second one injects the livewire javascript files.
Also note that i added the tinymce script cdn, we will use this later to display rich text editor in the mail templates CRUD.
I extracted the nav links in the top screen to a partial file so that we can reuse them in both app.blade.php and app2.blade.php.
resources/views/partials/nav.blade.php
<nav class="navbar navbar-expand-md navbar-light bg-white shadow-sm">
            <div class="container">
                <a class="navbar-brand" href="{{ url('/') }}">
                    {{ config('app.name', 'Laravel') }}
                </a>
                <button class="navbar-toggler" type="button" data-bs-toggle="collapse" data-bs-target="#navbarSupportedContent" aria-controls="navbarSupportedContent" aria-expanded="false" aria-label="{{ __('Toggle navigation') }}">
                    <span class="navbar-toggler-icon"></span>
                </button>

                <div class="collapse navbar-collapse" id="navbarSupportedContent">
                    <!-- Left Side Of Navbar -->
                    <ul class="navbar-nav me-auto">

                    </ul>

                    <!-- Right Side Of Navbar -->
                    <ul class="navbar-nav ms-auto">
                        <!-- Authentication Links -->
                        @guest
                            @if (Route::has('login'))
                                <li class="nav-item">
                                    <a class="nav-link" href="{{ route('login') }}">{{ __('Login') }}</a>
                                </li>
                            @endif

                            @if (Route::has('register'))
                                <li class="nav-item">
                                    <a class="nav-link" href="{{ route('register') }}">{{ __('Register') }}</a>
                                </li>
                            @endif
                        @else
                            <li class="nav-item dropdown">
                                <a id="navbarDropdown" class="nav-link dropdown-toggle" href="#" role="button" data-bs-toggle="dropdown" aria-haspopup="true" aria-expanded="false" v-pre>
                                    {{ Auth::user()->name }}
                                </a>

                                <div class="dropdown-menu dropdown-menu-right" aria-labelledby="navbarDropdown">
                                    <a class="dropdown-item" href="{{ url('mail-template') }}">
                                        Mail Templates
                                    </a>
                                    <a class="dropdown-item" href="{{ url('mail-variable') }}">
                                        Mail Variables
                                    </a>
                                    <a class="dropdown-item" href="{{ route('logout') }}"
                                       onclick="event.preventDefault();
                                                     document.getElementById('logout-form').submit();">
                                        {{ __('Logout') }}
                                    </a>

                                    <form id="logout-form" action="{{ route('logout') }}" method="POST" class="d-none">
                                        @csrf
                                    </form>
                                </div>
                            </li>
                        @endguest
                    </ul>
                </div>
            </div>
        </nav>
resources/views/layouts/app.blade.php
<!doctype html>
<html lang="{{ str_replace('_', '-', app()->getLocale()) }}">
<head>
    <meta charset="utf-8">
    <meta name="viewport" content="width=device-width, initial-scale=1">

    <!-- CSRF Token -->
    <meta name="csrf-token" content="{{ csrf_token() }}">

    <title>{{ config('app.name', 'Laravel') }}</title>

    <!-- Scripts -->
    <script src="{{ asset('js/app.js') }}" defer></script>

    <!-- Fonts -->
    <link rel="dns-prefetch" href="//fonts.gstatic.com">
    <link href="https://fonts.googleapis.com/css?family=Nunito" rel="stylesheet">

    <!-- Styles -->
    <link href="{{ asset('css/app.css') }}" rel="stylesheet">

    <style>
        .invalid-feedback {
            display:  inline-block !important;
        }
    </style>
</head>
<body>
    <div id="app">
        @include('partials.nav')

        <main class="py-4">
            @yield('content')
        </main>
    </div>
</body>
</html>
At this point let’s prepare some database tables, but let’s think about what tables do we need.
After digging i found that we need those two tables:
- mail_templates: This table for storing the email templates itself. Each template have a subject, title, template key and a body.
- mail_variables: What this table does is to store mail variables. Each variable have a key and a value. We use those variables in email templates, for example we can make variables for website logo, website url, the current username. Those variables will be replaced later with their real values when sending the email.
At first create a new mysql database using phpmyadmin named “dynamic_mailable” and then set the DB details in .env:
DB_CONNECTION=mysql
DB_HOST=127.0.0.1
DB_PORT=3306
DB_DATABASE=dynamic_mailable
DB_USERNAME=<db user>
DB_PASSWORD=<db password>
Next create two migrations and their models for the above tables like so:
php artisan make:model MailTemplate -m
php artisan make:model MailVariable -m
The “-m” option is to create the migration file alongside the model.
Now we created the migrations, open each one respectively and update the up() method like shown here:
database/migrations/<timestamp>_create_mail_templates_table.php
Schema::create('mail_templates', function (Blueprint $table) {
            $table->id();
            $table->string("title");
            $table->string("subject");
            $table->string("template_key")->unique();
            $table->text("body");
            $table->timestamps();
        });
database/migrations/<timestamp>_create_mail_variables_table.php
public function up()
    {
        Schema::create('mail_variables', function (Blueprint $table) {
            $table->id();
            $table->string("variable_key")->unique();
            $table->tinyText("variable_value")->nullable();
            $table->timestamps();
        });
    }
After that migrate the tables using:
php artisan migrate
Tip: If you encountered any issue in DB connectivity run
php artisan cache:clear
As you see in the mail_templates table, each template have a unique key so we will reference this key when querying the template instead of using the id.
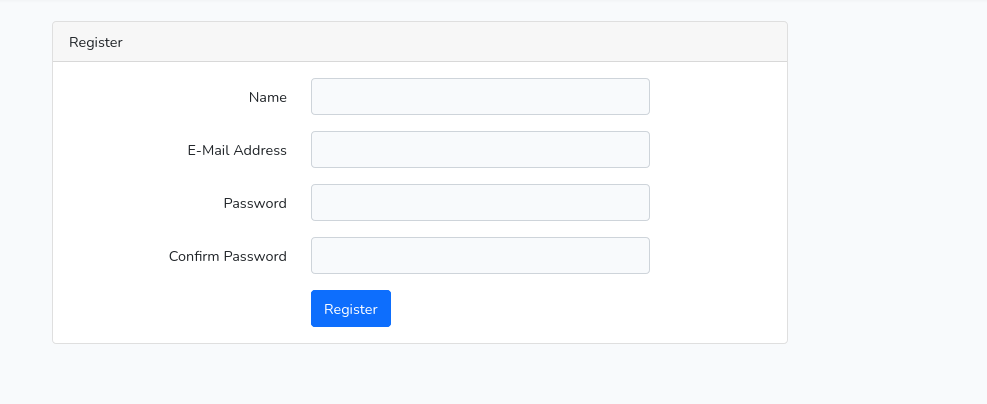
Before continuing into creating the CRUD for email templates and email variables, be sure to register because in the next section we will apply the auth middleware to CRUD pages.
Mail Variables CRUD
Create two livewire components, The first one for displaying a grid with all the variables, and the second for creating and updating:
php artisan make:livewire MailVariable/ListMailVariable
php artisan make:livewire MailVariable/CreateMailVariable
Each livewire component have a php class and a blade view. So if you look in app/Http you will see that a new directory created called “livewire” with two classes in it, ListMailVariable.php and CreateMailVariable.php. Also there are two view files in resources/views/livewire/mail-variable.
As with normal laravel components to render the livewire components in any view file you have to use any of these syntax:
@livewire('mail-variable.create-mail-variable')
Or
<livewire:mail-variable.create-mail-variable />
Also livewire component can be accessed using a route which is called livewire full page components, which we will achieve next.
Update routes/web.php like so:
Route::group(['middleware' => 'auth'] ,function () {
    Route::group(['prefix' => 'mail-variable'], function() {
        Route::get('/', App\Http\Livewire\MailVariable\ListMailVariable::class);
    });
});
Now you can access http://localhost/dynamic_mailable/public/mail-variable to view the component, you will see a blank page right now because we don’t add any code yet.
Displaying Mail Variables
Update app/Http/Livewire/MailVariable/ListMailVariable.php
<?php

namespace App\Http\Livewire\MailVariable;

use App\Models\MailVariable;
use Livewire\Component;
use Livewire\WithPagination;

class ListMailVariable extends Component
{
    use WithPagination;

    protected $paginationTheme = 'bootstrap';

    public $reload = false;

    public function deleteVariable($id)
    {
        MailVariable::find($id)->delete();

        $this->reload = true;

        session()->flash('success', 'Mail variable deleted with success!');
    }

    public function render()
    {
        return view('livewire.mail-variable.list-mail-variable', [
            'allVariables' => MailVariable::paginate(10)
        ]);
    }
}
Also update the corresponding view in
resources/views/livewire/mail-variable/list-mail-variable.blade.php
<div class="container">
    <div class="row justify-content-center">
        <div class="col-md-9">
            <div class="card">
                <div class="card-header">Mail Variables</div>


                <div class="card-body">
                    <button type="button" class="btn btn-secondary create-btn" style="float: right" wire:click="$emitTo('mail-variable.create-mail-variable', 'showCreateModal')"><i class="fa fa-plus"></i> Create</button>
                    <table class="table table-stripped">
                        <thead>
                        <tr>
                            <th>Variable Key</th>
                            <th>Variable Value</th>
                            <th></th>
                            <th></th>
                        </tr>
                        </thead>
                        <tbody>
                        @forelse($allVariables as $item)
                            <tr>
                                <td>{{$item->variable_key}}</td>
                                <td>{{$item->variable_value}}</td>
                                <td>
                                    <button type="button" class="btn btn-sm btn-outline-info btn-edit" wire:click="$emitTo('mail-variable.create-mail-variable', 'showCreateModalForUpdate', {{$item->id}})"><i class="fa fa-edit"></i> Edit</button>
                                </td>
                                <td>
                                    <form method="post" action="#" wire:submit.prevent="deleteVariable({{$item->id}})">
                                        @csrf
                                        @method('DELETE')
                                        <button type="submit" class="btn btn-sm btn-outline-danger" onclick="return confirm('are you sure?')"><i class="fa fa-remove"></i> Delete</button>
                                    </form>
                                </td>
                            </tr>
                        @empty
                            <tr>
                                <td colspan="4">No variables</td>
                            </tr>
                        @endforelse
                        </tbody>
                    </table>
                    {{ $allVariables->links() }}
                </div>
            </div>
        </div>
    </div>

    @livewire('mail-variable.create-mail-variable')
</div>
The ListMailVariable class responsible for rendering the list-mail-variable.blade.php view which is done in the render() method.
As you see we can send data to view in the same laravel way, here i send the allVariables parameter like so:
return view('livewire.mail-variable.list-mail-variable', [
            'allVariables' => MailVariable::paginate(10)
        ]);
In order for the pagination to work in livewire we must invoke the “withPagination” trait shown in the top of the class:
use WithPagination;

protected $paginationTheme = 'bootstrap';
Next i added the deleteVariable() method. This method invoked in the view using wire:submit event to delete a specific variable by id.
Tip: every public property or method in livewire class can be accessed into the view
To attach any event listener like click, submit etc we can use wire:<event>, this works the same as the javascript click event.
We achieve this in multiple places in the view file, first at the top right there is a button to create a new mail variable which if clicked will open a modal, using wire:click.
Another button which is the edit button also using the wire:click, and delete the button using wire:submit.prevent.
In the create button if you take a look at the wire event attached to it:
wire:click="$emitTo('mail-variable.create-mail-variable', 'showCreateModal')"
In this listener the wire:click event will trigger the livewire javascript $emitTo() function which emits an event to specific livewire class. The function takes there parameters as follows:
- the component name
- the event name
- optional arguments.
If you click at the button nothing will happen because we have to update the CreateMailVariable component.
There is also other functions to emit events like $emit(), $emitUp().
At the bottom of the view file i added this line to display the create mail variable modal:
@livewire('mail-variable.create-mail-variable')
Now let’s update the code for the create mail variable.
Creating & Editing Mail Variables
Update app/Http/Livewire/MailVariable/CreateMailVariable.php
<?php

namespace App\Http\Livewire\MailVariable;

use App\Models\MailVariable;
use Livewire\Component;

class CreateMailVariable extends Component
{
    public $variableKey = "";
    public $variableValue = "";

    public $itemId = null;

    protected $listeners = ['showCreateModal', 'closeCreateModal', 'showCreateModalForUpdate'];

    public $showModal = false;

    protected function rules()
    {
        return [
            'variableKey' => 'required|unique:mail_variables,variable_key' . ($this->itemId ? ',' . $this->itemId : '')
        ];
    }

    public function updated($propertyName)
    {
        $this->validateOnly($propertyName);
    }

    public function submit()
    {
        $this->validate();

        if(!$this->itemId) {
            $mailVariable = new MailVariable();
        } else {
            $mailVariable = MailVariable::find($this->itemId);
        }

        $mailVariable->variable_key = $this->variableKey;
        $mailVariable->variable_value = $this->variableValue;
        $mailVariable->save();

        session()->flash('success', 'Variable saved with success!');

        return redirect()->to('/mail-variable');
    }

    public function showCreateModal()
    {
        $this->reset('itemId', 'variableKey', 'variableValue');
        $this->resetErrorBag();
        $this->resetValidation();

        $this->itemId = null;

        $this->showModal = true;
    }

    public function showCreateModalForUpdate($id)
    {
        $this->reset('itemId', 'variableKey', 'variableValue');
        $this->resetErrorBag();
        $this->resetValidation();

        $this->itemId = $id;

        $mailVariable = MailVariable::find($id);
        $this->variableKey = $mailVariable->variable_key;
        $this->variableValue = $mailVariable->variable_value;

        $this->showModal = true;
    }

    public function closeCreateModal()
    {
        $this->showModal = false;
    }

    public function render()
    {
        return view('livewire.mail-variable.create-mail-variable');
    }
}
resources/views/livewire/mail-variable/create-mail-variable.blade.php
<div>
    @if($showModal)
        <div class="modal fade show show-modal" tabindex="-1" id="mail-variable-modal">
            <div class="modal-dialog">
                <div class="modal-content">
                    <form method="post" id="mail-variable-form" wire:submit.prevent="submit">
                        @csrf
                        <div class="modal-header">
                            <h5 class="modal-title">{{ !$itemId ? 'Create Variable' : 'Update Variable' }}</h5>
                            <button type="button" class="btn-close" wire:click="$emitTo('mail-variable.create-mail-variable', 'closeCreateModal')"></button>
                        </div>
                        <div class="modal-body">

                            @if (session()->has('success'))

                                <div class="alert alert-success">

                                    {{ session('success') }}

                                </div>

                            @endif

                            <div class="form-group">
                                <label>Key</label>
                                <input type="text" class="form-control" name="variable_key" wire:model.lazy="variableKey" />
                                @error('variableKey') <span class="invalid-feedback">{{ $message }}</span> @enderror

                                <div class="text-muted">
                                    Tip: Template variable keys must be unique and enclosed with two square brackets, <br/>
                                    <ul>
                                        <li>for static variables use uppercase letters like [WEBSITE_URL]</li>
                                        <li>for input variables use [INPUT:field_name] like [INPUT:name]</li>
                                        <li>for dynamic data use [DYNAMIC:$data]</li>
                                    </ul>
                                </div>
                            </div>
                            <div class="form-group">
                                <label>Value</label>
                                <input type="text" class="form-control" name="variable_value" wire:model.lazy="variableValue" />
                            </div>
                        </div>
                        <div class="modal-footer">
                            <button type="button" class="btn btn-secondary" wire:click="$emitTo('mail-variable.create-mail-variable', 'closeCreateModal')">Close</button>
                            <button type="submit" class="btn btn-primary">{{ !$itemId ? 'Save' : 'Update' }}</button>
                        </div>
                    </form>
                </div>
            </div>
        </div>
    @endif
</div>
First in the CreateMailVariable component class i declared some properties at the top. The $variableKey and $variableValue represent the two inputs in the create-mail-variable.blade.php view and i binded them using wire:model for two way model binding, this is like v-model in Vuejs.
The “.lazy” modifier attached to wire:model tells livewire to not update the field value after every keystroke, instead after the user finish typing.
The $itemId public property used in case of edit mode to assign the variable id to update.
The $listeners protected property defines a list of listeners. In livewire we can emit events from the component class to javascript or vice versa. For this we have to declare the $listeners property. Every key in the $listeners property refers to a public function we have to define.
For example the showCreateModal listener is a public function which show the form modal and reset the form. The two other listeners works the same way.
To emit events there different methods for this like emit(), emitTo(), emitUp(). Each method accept three arguments like so emit(<component>, <event>, optional params).
For example if you look at create-mail-variable.blade.php view, in the close modal button typically i emit an event using:
wire:click="$emitTo('mail-variable.create-mail-variable', 'closeCreateModal')"
To handle form validation in livewire all you have to do is to define a protected method called rules() which returns an array of validation rules. In this case i validate only for the variableKey. After that i invoked $this->validate() method in the submit() callback.
Besides that livewire also support live validations which triggers when the user types in the input field. To make this works you must override the updated() hook which i done above and call validateOnly($property) method.
Finally the submit() method triggered when the user submits the form using wire:submit.prevent event, do validate, then check if the $itemId is present, thereby we can create a new variable or update the existing variable, after that i displayed a success flash message and redirect the page to display all variables.
Now the full CRUD is completed for mail variables, just navigate to http://localhost/dynamic_mailable/public/mail-variable and give a try.
Take a look at these figures to see how to create different mail variables.
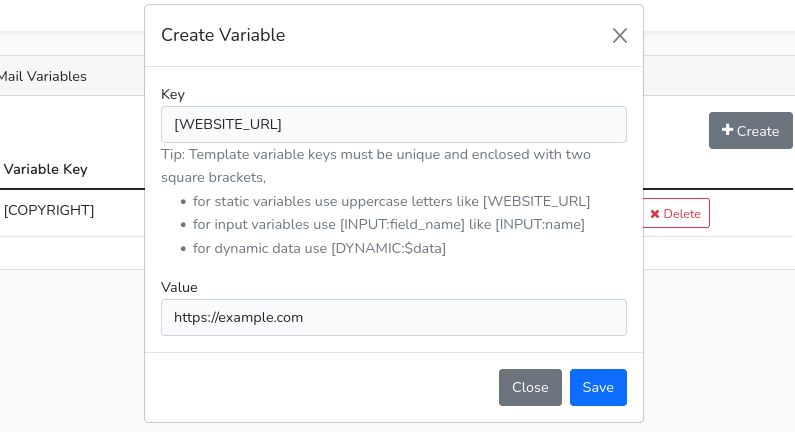
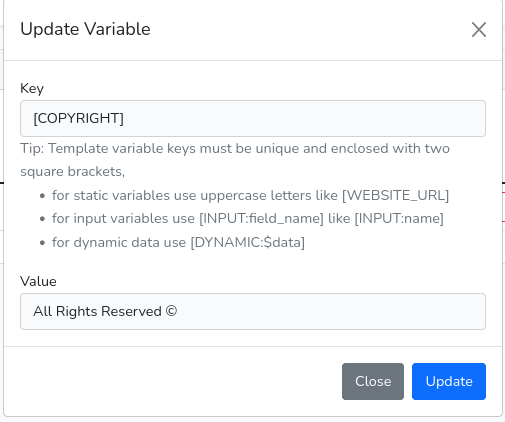
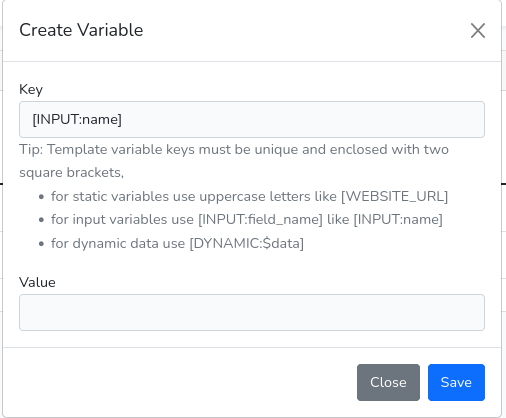
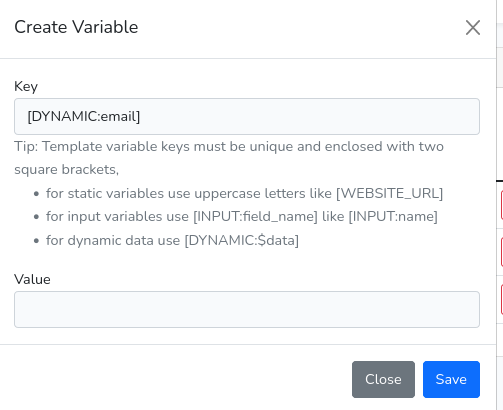
In these screenshots we can create 4 different types of mail variables:
- Static Variables: Which have specific key and specific value for example website url can have a key of “[WEBSITE_URL]” and value of “http://example.com”
- Input Variables: Which represent inputs obtained from POST or GET requests and must have this format [INPUT:<param>]. Those variables doesn’t need to have a value because we obtain the values from the form. for example consider we have a contact form like so:
<form method="post">
 <input type="text" name="name" />
 <input type="text" name="email" />
 <textarea name="content"></textarea>
</form>
If you need to include this form parameters in email template, then we can make a variable that represent each field, so here we have three fields [name, email, content] so we need to have these variables [INPUT:name], [INPUT:email], [INPUT:content] respectively.
- Dynamic Variables: This like the input variables and have this format [DYNAMIC:<param>] and also doesn’t need to have a value but this time the variable represent a dynamic value like a calculated value that you send along with template. An example for this is when you want to send a purchase invoice to the user with the total price, so you can make a variable like so [DYNAMIC:totalPrice].
- Reserved Variables: This type of variables like the static variables. Typically have a key and an empty value. We can use this type in case of some reserved variables in the system like [CURR_USER] which represent the current logged in user and the [WEBSITE_LOGO] which represent the site logo.
Later on below we will write a parser class that parses these different email variables, but let’s now finish the other module which is the mail templates CRUD.
Mail Templates CRUD
Create three new livewire components for List all templates, Creating new template, and Editing templates respectively
php artisan make:livewire MailTemplate/ListMailTemplate
php artisan make:livewire MailTemplate/CreateMailTemplate
php artisan make:livewire MailTemplate/EditMailTemplate
php artisan make:livewire MailTemplate/SendMailTemplate
Those commands will create three components, each component has it’s own class and view file. The four component SendMailTemplate will be used to send a test mail message to specific email.
Now add the routes that represent each page.
Open routes/web.php and inside the auth group add this code:
Route::group(['middleware' => 'auth'] ,function () {
    Route::group(['prefix' => 'mail-variable'], function() {
        Route::get('/', App\Http\Livewire\MailVariable\ListMailVariable::class);
    });

    Route::group(['prefix' => 'mail-template'], function() {
        Route::get('/', App\Http\Livewire\MailTemplate\ListMailTemplate::class);
        Route::get('/create', App\Http\Livewire\MailTemplate\CreateMailTemplate::class);
        Route::get('/edit/{id}', App\Http\Livewire\MailTemplate\EditMailTemplate::class);
        Route::get('/preview/{id}', function ($id) {
            $mailTemplate = \App\Models\MailTemplate::find($id);
            return $mailTemplate->body;
        });
    });
});
Displaying Mail Templates
Update app/Http/Livewire/MailTemplate/ListMailTemplate.php
<?php

namespace App\Http\Livewire\MailTemplate;

use App\Models\MailTemplate;
use Livewire\Component;
use Livewire\WithPagination;

class ListMailTemplate extends Component
{
    use WithPagination;

    protected $paginationTheme = 'bootstrap';

    public $reload = false;

    public function deleteTemplate($id)
    {
        MailTemplate::find($id)->delete();

        $this->reload = true;

        session()->flash('success', 'Mail template deleted with success!');
    }

    public function render()
    {
        return view('livewire.mail-template.list-mail-template', [
            'allTemplates' => MailTemplate::paginate(10)
        ]);
    }
}
resources/views/livewire/mail-template/list-mail-template.blade.php
<div class="container">
    <div class="row justify-content-center">
        <div class="col-md-9">
            <div class="card">
                <div class="card-header">Mail Templates</div>


                <div class="card-body">

                    @if (session()->has('success'))

                        <div class="alert alert-success">

                            {{ session('success') }}

                        </div>

                    @endif

                    <a class="btn btn-secondary create-btn" style="float: right" href="{{url('mail-template/create')}}"><i class="fa fa-plus"></i> Create</a>
                    <table class="table table-stripped">
                        <thead>
                        <tr>
                            <th>#</th>
                            <th>Title</th>
                            <th>Subject</th>
                            <th>Template Key</th>
                            <th></th>
                            <th></th>
                            <th></th>
                            <th></th>
                        </tr>
                        </thead>
                        <tbody>
                        @forelse($allTemplates as $item)
                            <tr>
                                <td>{{$item->id}}</td>
                                <td>{{$item->title}}</td>
                                <td>{{$item->subject}}</td>
                                <td>{{$item->template_key}}</td>
                                <td>
                                    <a href="{{url('mail-template/edit/' . $item->id)}}" class="btn btn-sm btn-outline-info btn-edit"><i class="fa fa-edit"></i> Edit</a>
                                </td>
                                <td>
                                    <a href="{{url('mail-template/preview/' . $item->id)}}" target="_blank" class="btn btn-sm btn-outline-success"><i class="fa fa-camera"></i> Preview</a>
                                </td>
                                <td>
                                    <button class="btn btn-sm btn-outline-dark" wire:click="$emitTo('mail-template.send-mail-template','showSendModal', {{$item->id}})"><i class="fa fa-envelope"></i> Test Send</button>
                                </td>
                                <td>
                                    <form method="post" action="#" wire:submit.prevent="deleteTemplate({{$item->id}})">
                                        @csrf
                                        @method('DELETE')
                                        <button type="submit" class="btn btn-sm btn-outline-danger" onclick="return confirm('are you sure?')"><i class="fa fa-remove"></i> Delete</button>
                                    </form>
                                </td>
                            </tr>
                        @empty
                            <tr>
                                <td colspan="4">No mail templates</td>
                            </tr>
                        @endforelse
                        </tbody>
                    </table>
                    {{ $allTemplates->links() }}

                </div>
            </div>
        </div>
    </div>

    @livewire('mail-template.send-mail-template')
</div>
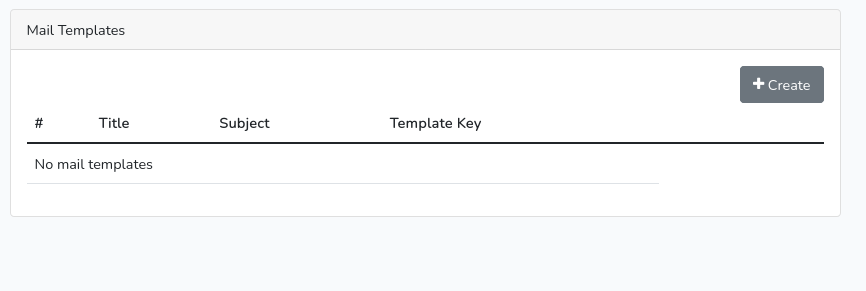
Now if you refresh the browser and go to /mail-template you will see the page like in the figure
The next step is to implement the create functionality.
Before adding the code for the create and update mail templates, i created a PHP trait that contains some shared methods to be used in the create and update classes.
So create new file “MailTemplateFormTrait” inside of app/Http/Livewire/MailTemplate
MailTemplateFormTrait.php
<?php
namespace App\Http\Livewire\MailTemplate;

use App\Models\MailTemplate;

trait MailTemplateFormTrait
{
    public function updated($propertyName)
    {
        $this->validateOnly($propertyName);
    }

    protected function rules()
    {
        return [
            'title' => 'required',
            'subject' => 'required',
            'templateKey' => 'required|unique:mail_templates,template_key' . (isset($this->itemId) ? ',' . $this->itemId : ''),
            'body' => 'required|min:20'
        ];

    }

    public function setBody($data)
    {
        $this->body = $data;
    }

    public function submit()
    {
        $this->validate();

        if(isset($this->itemId) && $this->itemId) {
            $mailTemplate = MailTemplate::find($this->itemId);
        } else {
            $mailTemplate = new MailTemplate();
        }

        $mailTemplate->title = $this->title;
        $mailTemplate->subject = $this->subject;
        $mailTemplate->body = $this->body;
        $mailTemplate->template_key = $this->templateKey;
        $mailTemplate->save();

        if(isset($this->itemId) && $this->itemId) {
            session()->flash('success', 'Mail template updated with success!');
        } else {
            session()->flash('success', 'Mail template created with success!');
        }

        return redirect()->to('/mail-template');
    }
}
This trait contains some shared methods like rules(), updated(), submit() and setBody() and will be reused in both the create and update livewire classes instead of repeating them.
Creating & Editing Mail Templates
Update app/Http/Livewire/MailTemplate/CreateMailTemplate.php
<?php

namespace App\Http\Livewire\MailTemplate;

use App\Models\MailVariable;
use Livewire\Component;

class CreateMailTemplate extends Component
{
    use MailTemplateFormTrait;

    public $title = "";
    public $subject = "";
    public $body = "";
    public $templateKey = "";

    protected $listeners = ["setBody"];

    public function render()
    {
        return view('livewire.mail-template.create-mail-template', [
            'mailVariables' => MailVariable::all()
        ]);
    }
}
Update resources/views/livewire/mail-template/create-mail-template.blade.php
<div class="container">
    <div class="row">
        <div class="col-md-9">
            <div class="card">
                <div class="card-header">Create Mail Template</div>


                <div class="card-body">

                    @if (session()->has('success'))

                        <div class="alert alert-success">

                            {{ session('success') }}

                        </div>

                    @endif

                    <form method="post" wire:submit.prevent="submit">

                        @csrf

                        <div class="form-group">
                            <label>Title</label>
                            <input type="text" class="form-control @error('title') is-invalid @endif" name="title" wire:model.lazy="title" />
                            @error('title') <span class="invalid-feedback">{{ $message }}</span> @enderror
                        </div>

                        <div class="form-group">
                            <label>Template Key</label>
                            <input type="text" class="form-control @error('templateKey') is-invalid @endif" name="template_key" wire:model.lazy="templateKey" />
                            @error('templateKey') <span class="invalid-feedback">{{ $message }}</span> @enderror
                        </div>

                        <div class="form-group">
                            <label>Subject</label>
                            <input type="text" class="form-control @error('subject') is-invalid @endif" name="subject" wire:model.lazy="subject" />
                            @error('subject') <span class="invalid-feedback">{{ $message }}</span> @enderror
                        </div>

                        <div class="form-group" wire:ignore>
                            <label>Email Content</label>

                            @include('partials.mail-variables')

                            <textarea class="form-control" name="body" id="editor"></textarea>

                            @error('body') <span class="invalid-feedback">{{ $message }}</span> @enderror
                        </div>

                        <div class="d-grid gap-2 mt-2">
                            <input type="submit" class="btn btn-primary" value="Create" />
                        </div>

                    </form>

                </div>
            </div>
        </div>
        <div class="col-md-3">
            @include('partials.template-preview')
        </div>
    </div>

    @push('scripts')

        <script type="text/javascript" src="{{asset('js/tinymce.js')}}"></script>

        <script>
            initializeTinymce((content) => @this.set('body', content));
        </script>

    @endpush

</div>
In the same way update app/Http/Livewire/MailTemplate/EditMailTemplate.php
<?php

namespace App\Http\Livewire\MailTemplate;

use App\Models\MailTemplate;
use App\Models\MailVariable;
use Livewire\Component;

class EditMailTemplate extends Component
{
    use MailTemplateFormTrait;

    public $title = "";
    public $subject = "";
    public $body = "";
    public $templateKey = "";

    public $itemId;

    protected $listeners = ["setBody"];

    public function mount($id)
    {
        $mailTemplate = MailTemplate::find($id);

        $this->fill([
            'itemId' => $id,
            'title' => $mailTemplate->title,
            'subject' => $mailTemplate->subject,
            'body' => $mailTemplate->body,
            'templateKey' => $mailTemplate->template_key
        ]);
    }

    public function render()
    {
        return view('livewire.mail-template.edit-mail-template', [
            'mailVariables' => MailVariable::all()
        ]);
    }
}
resources/views/livewire/mail-template/edit-mail-template.blade.php
<div class="container">
    <div class="row">
        <div class="col-md-9">
            <div class="card">
                <div class="card-header">Edit Mail Template</div>


                <div class="card-body">

                    @if (session()->has('success'))

                        <div class="alert alert-success">

                            {{ session('success') }}

                        </div>

                    @endif

                    <form method="post" wire:submit.prevent="submit({{$itemId}})">

                        @csrf

                        <div class="form-group">
                            <label>Title</label>
                            <input type="text" class="form-control @error('title') is-invalid @endif" name="title" wire:model.lazy="title" />
                            @error('title') <span class="invalid-feedback">{{ $message }}</span> @enderror
                        </div>

                        <div class="form-group">
                            <label>Template Key</label>
                            <input type="text" class="form-control @error('templateKey') is-invalid @endif" name="template_key" wire:model.lazy="templateKey" />
                            @error('templateKey') <span class="invalid-feedback">{{ $message }}</span> @enderror
                        </div>

                        <div class="form-group">
                            <label>Subject</label>
                            <input type="text" class="form-control @error('subject') is-invalid @endif" name="subject" wire:model.lazy="subject" />
                            @error('subject') <span class="invalid-feedback">{{ $message }}</span> @enderror
                        </div>

                        <div class="form-group" wire:ignore>
                            <label>Email Content</label>

                            @include('partials.mail-variables')

                            <textarea class="form-control" name="body" id="editor">{{$body}}</textarea>
                            @error('body') <span class="invalid-feedback">{{ $message }}</span> @enderror
                        </div>

                        <div class="d-grid gap-2 mt-2">
                            <input type="submit" class="btn btn-primary" value="Update" />
                        </div>

                    </form>

                </div>
            </div>
        </div>
        <div class="col-md-3">
            @include('partials.template-preview')
        </div>
    </div>

    @push('scripts')

        <script type="text/javascript" src="{{asset('js/tinymce.js')}}"></script>

        <script>
            initializeTinymce((content) => {
            @this.set('body', content);
            });
        </script>

    @endpush

</div>
Also create these partial views:
resources/views/partials/mail-variables.blade.php
<div class="mail-variables" style="margin-bottom: 5px">
    <i class="fa fa-info-circle"></i> <span>You can use any of these predefined variables in your template</span>
    @foreach($mailVariables as $v)
        <span class="badge bg-secondary" title="{{ $v->variable_value }}">{{$v->variable_key}}</span>
    @endforeach
</div>
resources/views/partials/template-preview.blade.php
@if($body)
    <h3 class="text-center">Preview</h3>
    <iframe srcdoc="{{$body}}" style="border: 3px solid #ccc; border-radius: 5px;padding: 5px; width:400px; height: 500px; overflow: scroll">

    </iframe>
@endif
public/js/tinymce.js
function initializeTinymce(onchange) {
    window.onload = () => {
        tinymce.init({
            selector: '#editor',
            plugins: 'print fullpage preview code powerpaste casechange importcss tinydrive searchreplace autolink autosave save directionality advcode visualblocks visualchars fullscreen image link media mediaembed template codesample table charmap hr pagebreak nonbreaking anchor insertdatetime advlist lists checklist wordcount tinymcespellchecker a11ychecker textpattern noneditable help formatpainter permanentpen pageembed charmap tinycomments mentions quickbars linkchecker emoticons advtable export',
            menubar: 'file edit view insert format tools table tc help',
            toolbar: 'undo redo | bold italic underline strikethrough | fontselect fontsizeselect formatselect | alignleft aligncenter alignright alignjustify | outdent indent |  numlist bullist checklist | forecolor backcolor casechange permanentpen formatpainter removeformat | pagebreak | charmap emoticons | fullscreen  preview save print | insertfile image media pageembed template link anchor codesample | a11ycheck ltr rtl | showcomments addcomment',
            autosave_ask_before_unload: true,
            image_advtab: true,
            height: 600,
            image_caption: true,
            toolbar_mode: 'sliding',
            contextmenu: 'link image imagetools table configurepermanentpen',
            setup: (ed) => {
                ed.on('change', (e) => onchange(ed.getContent()));
            }
        });

    }
};
In the above code As usual i declared the form variables as public properties like $title, $subject, $body, etc.
The CreateMailTemplate and EditMailTemplate classes are the same, except that in the EditMailTemplate class has the mount() method.
The mount() method is a life cycle hook in livewire that executed once in the initial page load. Here i passed the $id param which get captured from the url. We use this $id to find the template details to prepopulate the form data using the helper method $this->fill().
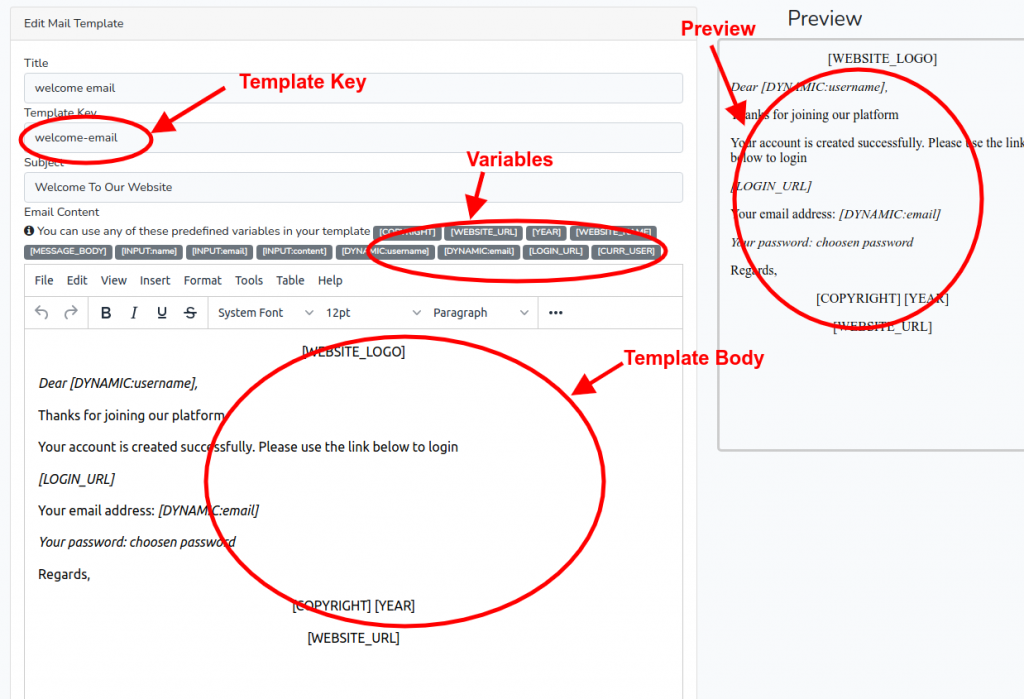
In both create-mail-template.blade.php and edit-mail-template.blade.php i displayed two column grid. The first column contain the form and the second column contain a preview window which when the user fills in the body field the preview will refresh instantly with the template contents.
I extracted the preview template code in the shared view template-preview.blade.php which display an html <iframe />
Don’t forget to send the email variables list along in the render() method in both the CreateMailTemplate and EditMailTemplate classes like so:
public function render()
    {
        return view('livewire.mail-template.create-mail-template', [
            'mailVariables' => MailVariable::all()
        ]);
    }
Finally the public/js/tinymce.js contains the initialization code for the tinymce rich text editor. When calling initializeTinymce() function i provided a callback that fires when user change body to update the body field using livewire’s @this.set()
Now refresh the browser and go to /mail-template/create you will see the page like in the figure
Refactoring the create and edit views (optional)
If you wish to refactor the create and edit views to extract the form in a separate view you can do this easily and livewire will work as usual, so i extracted the form into separate view like so:
resources/views/livewire/mail-template/_mail-template-form.blade.php
@if (session()->has('success'))

    <div class="alert alert-success">

        {{ session('success') }}

    </div>

@endif

<form method="post" wire:submit.prevent="submit">

    @csrf

    <div class="form-group">
        <label>Title</label>
        <input type="text" class="form-control @error('title') is-invalid @endif" name="title" wire:model.lazy="title" />
        @error('title') <span class="invalid-feedback">{{ $message }}</span> @enderror
    </div>

    <div class="form-group">
        <label>Template Key</label>
        <input type="text" class="form-control @error('templateKey') is-invalid @endif" name="template_key" wire:model.lazy="templateKey" />
        @error('templateKey') <span class="invalid-feedback">{{ $message }}</span> @enderror
    </div>

    <div class="form-group">
        <label>Subject</label>
        <input type="text" class="form-control @error('subject') is-invalid @endif" name="subject" wire:model.lazy="subject" />
        @error('subject') <span class="invalid-feedback">{{ $message }}</span> @enderror
    </div>

    <div class="form-group" wire:ignore>
        <label>Email Content</label>

        @include('partials.mail-variables')

        <textarea class="form-control" name="body" id="editor">{!! $body !!}</textarea>

        @error('body') <span class="invalid-feedback">{{ $message }}</span> @enderror
    </div>

    <div class="d-grid gap-2 mt-2">
        <input type="submit" class="btn btn-primary" value="{{ isset($itemId) ? 'Update' : 'Create' }}" />
    </div>

</form>
Then update the the create and edit view by including the form:
resources/views/livewire/mail-template/create-mail-template.blade.php
<div class="container">
    <div class="row">
        <div class="col-md-9">
            <div class="card">
                <div class="card-header">Create Mail Template</div>


                <div class="card-body">

                    @include('livewire.mail-template._mail-template-form')

                </div>
            </div>
        </div>
        <div class="col-md-3">
            @include('partials.template-preview')
        </div>
    </div>

    @push('scripts')

        <script type="text/javascript" src="{{asset('js/tinymce.js')}}"></script>

        <script>
            initializeTinymce((content) => @this.set('body', content));
        </script>

    @endpush

</div>
resources/views/livewire/mail-template/edit-mail-template.blade.php
<div class="container">
    <div class="row">
        <div class="col-md-9">
            <div class="card">
                <div class="card-header">Edit Mail Template</div>


                <div class="card-body">

                    @include('livewire.mail-template._mail-template-form')

                </div>
            </div>
        </div>
        <div class="col-md-3">
            @include('partials.template-preview')
        </div>
    </div>

    @push('scripts')

        <script type="text/javascript" src="{{asset('js/tinymce.js')}}"></script>

        <script>
            initializeTinymce((content) => {
            @this.set('body', content);
            });
        </script>

    @endpush

</div>
Now the full CRUD is completed for mail templates. What’s missing in this part is the to add the code for test email component which we will see in the next part.