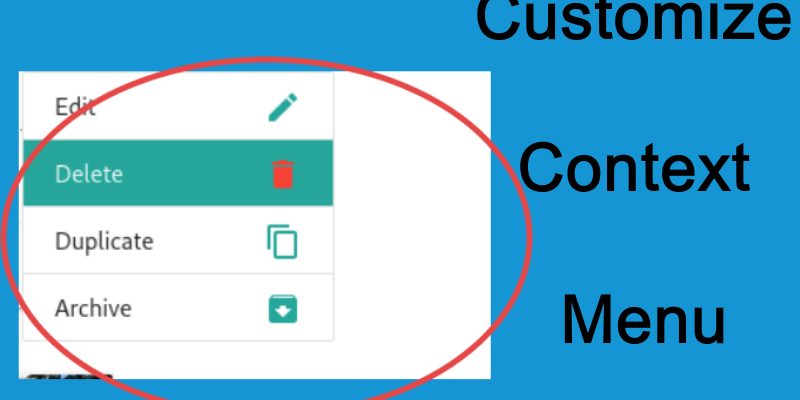
Context menu is such a menu that appears when you click the right mouse button in firefox or chrome, in fact we can customize or override this menu let’s see how we can do this below.
Usually web browsers use context menus to achieve specific tasks like DOM inspection, view page source, reloading. You can already see this in firefox or chrome, for example in firefox there are actions such as “Save Page As“, “Inspect Element (Q)“, etc. also in chrome the context menu shows actions such as “Back“, “Reload“, “Print” as shown in this figure:
 |
 |
Perhaps you might saw web applications that override this menu and show a different one when pressing the right mouse button, these applications utilize a special javascript which is “contextmenu“. By listening to this event we can create a custom context menu specifically for our app and you can create different context menus on the same page.
To demonstrate this let’s run this snippet in your browser:
document.addEventListener( "contextmenu", function(e) {
    alert("firing context menu");
});
When executing this snippet you will see that the alert appear whenever you press the right mouse button. Now by using this knowledge let’s utilize create a sample context menu using materializecss library.
Preparing The Menu Html
let’s assume we have a list of products and we need to show these controls when the user right click over the mouse which area (edit, delete, duplicate, archive):
<ul class="collection" id="actions-menu">
        <li class="collection-item"><div>Edit<a href="#!" class="secondary-content"><i class="material-icons">edit</i></a></div></li>
        <li class="collection-item active"><div>Delete<a href="#!" class="secondary-content red-text"><i class="material-icons">delete</i></a></div></li>
        <li class="collection-item"><div>Duplicate<a href="#!" class="secondary-content"><i class="material-icons">content_copy</i></a></div></li>
        <li class="collection-item"><div>Archive<a href="#!" class="secondary-content"><i class="material-icons">archive</i></a></div></li>
      </ul>
In this code i used the materializecss classes to style our list but for this to work we have add the materialize stylesheet, for the purpose of this tutorial i will the use a cdn.
<!DOCTYPE html>
<html>
<head>
    <meta charset="utf-8" />
    <title>Context menu</title>
    <link rel="stylesheet" href="https://cdnjs.cloudflare.com/ajax/libs/materialize/1.0.0/css/materialize.min.css">
    <link href="https://fonts.googleapis.com/icon?family=Material+Icons" rel="stylesheet">

    <style>
        ul#actions-menu {
  			width: 200px;
  			position: fixed;
  			z-index: 99999;
        }
    </style>
</head>
<body>

    <ul class="collection" id="actions-menu">
        <li class="collection-item"><div>Edit<a href="#!" class="secondary-content"><i class="material-icons">edit</i></a></div></li>
        <li class="collection-item active"><div>Delete<a href="#!" class="secondary-content red-text"><i class="material-icons">delete</i></a></div></li>
        <li class="collection-item"><div>Duplicate<a href="#!" class="secondary-content"><i class="material-icons">content_copy</i></a></div></li>
        <li class="collection-item"><div>Archive<a href="#!" class="secondary-content"><i class="material-icons">archive</i></a></div></li>
      </ul>

    <script>
        document.addEventListener( "contextmenu", function(e) {
            e.preventDefault();

    		        showMenu(e);
  		});

  		function showMenu(event)
  		{

  		}

    </script>
</body>
</html>
Now our beautiful menu is shown, the next step is to make this menu hidden because context menus is hidden by default and appear only when you click on right click on specific element so modify the styles add display: none to ul#actions-menu as shown:
ul#actions-menu {
  			width: 200px;
  			position: fixed;
  			z-index: 99999;
                        display: none;
        }
Now if you run the code it will be hidden, to show it whenever we click the right mouse button let’s update the showMenu() function as follows:
function showMenu(event)
  		{
  			document.querySelector("ul#actions-menu").style.display = "inline-block";
    		document.querySelector("ul#actions-menu").style.top = event.clientY + "px";
    		document.querySelector("ul#actions-menu").style.left = event.clientX + "px";
  		}
As shown the process is so simple, i set the display property to “inline-block” to shown it again, and most important is to set the top and left properties to event.clientY and event.clientX respectively, this to ensures that the menu will appear in the same position as the mouse pointer.
Now give this a try, you will see how the menu appears.
Hiding the Menu When Left Clicking
An important aspect of context menus is that the made hidden when you click the left mouse button or when you see an action from the list of actions, to achieve this we will listen for the “click” and “onkeyup” events as follows:
document.addEventListener( "click", function(e) {
            var button = e.which || e.button;
            if ( button === 1 ) {
              hideMenu();
            }
        });

        window.onkeyup = function(e) {
            if ( e.keyCode === 27 ) {
              hideMenu();
            }
  		}

function hideMenu()
  		{
  			document.querySelector("ul#actions-menu").style.display = "none";
  		}
As shown above to hide the menu is a matter of reverting the css display property back to “none“. Now if you click outside the menu it will disappear.
Display The Menu If Clicking Inside Specific Element
Sometimes we want to show the context menu only if we click inside specific element. There are a couple of ways to do this, one of these ways is to check the element id’s of classes, let’s extend the above example to display list of products and forcing the menu to show only when clicking on any product.
<!DOCTYPE html>
<html>
<head>
<meta charset="utf-8" />
<title>Context menu</title>
<link rel="stylesheet" href="https://cdnjs.cloudflare.com/ajax/libs/materialize/1.0.0/css/materialize.min.css">
<link href="https://fonts.googleapis.com/icon?family=Material+Icons" rel="stylesheet">
<style>
ul#actions-menu {
width: 200px;
display: none;
position: fixed;
z-index: 99999;
}
#product-list {
width: 532px;
}
</style>
</head>
<body>
<ul class="collection" id="actions-menu">
<li class="collection-item"><div>Edit<a href="#!" class="secondary-content"><i class="material-icons">edit</i></a></div></li>
<li class="collection-item active"><div>Delete<a href="#!" class="secondary-content red-text"><i class="material-icons">delete</i></a></div></li>
<li class="collection-item"><div>Duplicate<a href="#!" class="secondary-content"><i class="material-icons">content_copy</i></a></div></li>
<li class="collection-item"><div>Archive<a href="#!" class="secondary-content"><i class="material-icons">archive</i></a></div></li>
</ul>
<div id="product-list">
<div class="row">
<div class="col s12 m7">
<div class="card">
<div class="card-image">
<img src="https://materializecss.com/images/sample-1.jpg">
<span class="card-title">Card Title</span>
</div>
<div class="card-content">
<p>I am a very simple card. I am good at containing small bits of information.
I am convenient because I require little markup to use effectively.</p>
</div>
<div class="card-action">
<a href="#">This is a link</a>
</div>
</div>
</div>
</div>
<div class="row">
<div class="col s12 m7">
<div class="card">
<div class="card-image">
<img src="https://materializecss.com/images/sample-1.jpg">
<span class="card-title">Card Title</span>
</div>
<div class="card-content">
<p>I am a very simple card. I am good at containing small bits of information.
I am convenient because I require little markup to use effectively.</p>
</div>
<div class="card-action">
<a href="#">Cart Link</a>
</div>
</div>
</div>
</div>
</div>
<script>
document.addEventListener( "contextmenu", function(e) {
if(e.target.getAttribute("class") == "card" || checkParent(e.target)) {
e.preventDefault();
showMenu(e);
}
});
function checkParent(elem)
{
var found = false;
while (elem &&!found) {
if (elem.getAttribute && elem.getAttribute("class") == "card"){
found = true;
}
elem = elem.parentNode;
}
return found;
}
function showMenu(event)
{
document.querySelector("ul#actions-menu").style.display = "inline-block";
document.querySelector("ul#actions-menu").style.top = event.clientY + "px";
document.querySelector("ul#actions-menu").style.left = event.clientX + "px";
}
function hideMenu()
{
document.querySelector("ul#actions-menu").style.display = "none";
}
document.addEventListener( "click", function(e) {
var button = e.which || e.button;
if ( button === 1 ) {
hideMenu();
}
});
window.onkeyup = function(e) {
if ( e.keyCode === 27 ) {
hideMenu();
}
}
</script>
</body>
</html>
As shown in the above code i added some products and added a function checkParent(), this function check the element parent and it the element parent equal to “card” then this is the right element and in this case we display the menu, but if you click outside any product card it will display the native browser menu.


