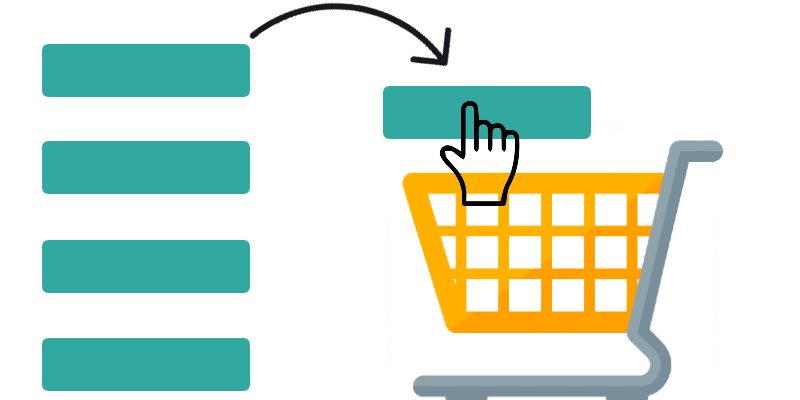
In this article, we will learn about the drag and drop API in JavaScript and the events used in drag and drop with some simple examples.
You may have used drag and drop capability before in your web applications through using some third party library like for example Jquery UI draggable or some other library. Besides to that it’s important to how drag and drop works in javascript to understand what’s going on behind the scenes.
At first what’s the drag and drop feature. The drag and drop feature enable users to select a draggable element and drop it into droppable zone.
In HTML to mark an element as draggable you have to assign draggable=”true” attribute to the source element we want to drag. Passing false to tha draggable attribute mark the element as non draggable.
<img src="image.jpg" draggable="true" />    // draggable


<img src="image.jpg" draggable="false" />    // non draggable
So to implement drag and drop in a webpage you must have setup these things:
- A source element with draggable=”true” attribute.
- A drop element (drop zone) usually a div which we will contain the draggable elements.
- Listeners for drag and drop events. In these events we will move the element or take a copy of it to the drop zone.
Drag and Drop Interfaces
The drag and drop Api has the following interfaces:
- DragEvent: DOM event that inherits properties from MouseEvent and Event has one additional property of type DataTransfer interface. This event represent the drag and drop interaction when the user select an element with the mouse.
- DataTransfer: The most important interface in the drag api. This interface hold data about the transferred element and operation type (move or copy). Contains a list of drag data items of type DataTransferItem.
- DataTransferItem: Represent one dragged item in the DataTransfer interface. Holds two properties, kind (string or file) and type which is the mime type of the data.
- DataTransferItemList: Represent a list of dragged items, each item is of type DataTransferItem.
Drag and Drop Events
There are several events fired when working with drag and drop which are:
- ondragstart: This is the first event fired. The user starts dragging a draggable item (html element or text selection).
- ondrag: Fired on dragged item. This event continuously fired when the element is selected until it released.
- ondragenter: Fired on dragged item when the draggable item enters a valid drop target.
- ondragleave: Fired on dragged item when the draggable item leaves a valid drop target.
- ondragover: Fired on drop target continuously when the draggable item over a valid drop target. This is different from ondragenter as the latter when the drag item just enters the drop target.
- ondrop: Fired on drop target, when the item is being dropped on the drop target.
- ondragend: This is the last event fired. Fired on dragged item when drag operation finishes, weather releasing the mouse key or cancel the drag with the Esc key.
Example: demonstrating events
<!DOCTYPE html>
<html>
<head>
    <meta charset="utf-8">
    <title>drag and drop events</title>
</head>
<body>

    <img id="img-node" width="200" src="./image.jpg" draggable="true" ondragstart="dragstartHandler(event)" ondrag="ondragHandler(event)" ondragend="ondragendHandler(event)" ondragenter="ondragenterHandler(event)" ondragleave="ondragleaveHandler(event)" />


    <div ondrop="ondropHandler(event)" ondragover="ondragOverHandler(event)" id="drop-zone" style="width: 500px; height: 600px; border: 1px solid #ccc;"></div>

    <script>
        function dragstartHandler(ev)
        {
            console.log('----------------ondragstart - drag started');
        }

        function ondragHandler(ev)
        {
            console.log("----------------ondrag");
        }

        function ondragenterHandler(ev)
        {
            ev.preventDefault();
            console.log("----------------ondragenter");
        }

        function ondragOverHandler(ev)
        {
            ev.preventDefault();
            console.log("-----------------------ondragover");
        }

        function ondragleaveHandler(ev)
        {
            console.log("----------------ondragleave");
        }

        function ondropHandler(ev)
        {
            ev.preventDefault();
            console.log("-----------------------ondrop");
        }


        function ondragendHandler(ev)
        {
            console.log("----------------ondragend - drag finished");
        }
    </script>

</body>
</html>
In this code above there is an image which is the draggable item in this case which has draggable=”true” attribute. The drop area is a div and i give it a border, width and height. As you see the listeners assigned to both the draggable item and the drop area.
Now if you select the image and drop it in the drop area and inspect the console you will see the sequence of events. The ondragstart fired first and the ondragend fired last and the ondrop fired when dropping the element.
The ondrag continuously fired when you select and move with the item. The ondragover continuously fired when you select and move with the item over the drop area.
In this simple example no real movement is actually happens to source element so let’s see below how to put the element on the drop area.
Example: moving image to drop zone
Modify both the dragstartHandler() and ondropHandler() functions respectively as follows:
function dragstartHandler(ev)
{
     console.log('----------------ondragstart - drag started');

     ev.dataTransfer.setData("text/html", ev.target.id);
}

function ondropHandler(ev)
{
     ev.preventDefault();
     console.log("-----------------------ondrop");


    try {
    if(ev.target.id == "drop-zone") {
        const dataValue = ev.dataTransfer.getData("text/html");
        let ele = document.querySelector("#" + dataValue);
        ev.target.appendChild(ele);
    }
    } catch(err) {
    console.error(err);
    }
}
In this code i have updated the event listeners for ondragstart and ondrop. This is the important listeners when handling drag and drag. In the dragstartHandler() typically we set the drag data which to specify what the type of data and the data itself. This is done using setData() function in the DataTransfer object.
The setData(dataType, dataValue) function accept two arguments, the data type and the data value respectively. The data type is a mime type string for the data.
Two common types exist which are:
- text/plain: For dragging textual content such as text inside <p> tag.
- text/html: For dragging any html node.
There are also other types not commonly used some of them:
- text/uri-list: For dragging hyperlinks.
- application/x-moz-file: only in firefox
- image/jpeg
- image/png
- image/gif
In the above example since we dragging an <img /> tag so i specify that the type be “text/html” and the data value is the element id.
The second part of the example which is ondropHandler() which executed when ondrop event fires and it responsible for handling the drop. Since we used setData() function in the first step also there is a corresponding function in the DataTransfer object which is getData() function.
The getData() takes the data type that was passed to setData() and retrieve the data value:
const dataValue = ev.dataTransfer.getData("text/html"); // img-node
In this example the data value is the element id which in this case the “img-node”. Then i used document.querySelector() using the element id to retrieve the element. Then to add the element to the drop target is a matter of calling ev.target.appendChild() function.
Now if you run the example and try to select the image and drag into the drop area it will be dropped.
In the above example we passed the element id as the second argument to setData() but in fact you can pass any content, for example:
ev.dataTransfer.setData("text/html", '<img src="./image.jpg" />');
ev.dataTransfer.setData("text/html", 'Javascript <strong>Drag and Drop</strong>');
ev.dataTransfer.setData("text/plain", 'This is text content');
Example: dragging different items:
<!DOCTYPE html>
<html>
<head>
    <meta charset="utf-8">
    <title>drag and drop events</title>
</head>
<body>

     <div style="width: 400px; float: left;">
         <ul>
        	<li>
               <img width="200" src="./image.jpg" draggable="true" ondragstart="dragstartHandler(event, 'text/html')" ondrag="ondragHandler(event)" ondragend="ondragendHandler(event)" ondragenter="ondragenterHandler(event)" ondragleave="ondragleaveHandler(event)" />
        	</li>
        	<li>
        		<p draggable="true" ondragstart="dragstartHandler(event, 'text/plain')">Lorem ipsum dolor sit amet, consectetur adipisicing elit, sed do eiusmod</p>
        	</li>
        	<li>
        		<button type="button" draggable="true" ondragstart="dragstartHandler(event, 'text/html')">Button</button>
        	</li>
        	<li>
        		<ul draggable="true" ondragstart="dragstartHandler(event, 'text/html')">
        			<li>Element 1</li>
        			<li>Element 2</li>
        			<li>Element 3</li>
        		</ul>
        	</li>
        </ul>
    </div>


    <div ondrop="ondropHandler(event)" ondragover="ondragOverHandler(event)" id="drop-zone" style="width: 500px; height: 600px; border: 1px solid #cccf;float: left;"></div>

    <script>
        function dragstartHandler(ev, type)
        {
            console.log('----------------ondragstart - drag started');

            if(type == 'text/html') {
            	ev.dataTransfer.setData(type, ev.target.outerHTML);
            } else {
            	ev.dataTransfer.setData(type, ev.target.innerText);
            }

        }

        function ondragHandler(ev)
        {
            console.log("----------------ondrag");
        }

        function ondragenterHandler(ev)
        {
            ev.preventDefault();
            console.log("----------------ondragenter");
        }

        function ondragOverHandler(ev)
        {
            ev.preventDefault();
            console.log("-----------------------ondragover");
        }

        function ondragleaveHandler(ev)
        {
            console.log("----------------ondragleave");
        }

        function ondropHandler(ev)
        {
            ev.preventDefault();
            console.log("-----------------------ondrop");


            try {
                let dataVal;

                if(ev.target.id == "drop-zone") {
                    if(ev.dataTransfer.getData("text/html")) {
                         dataVal = ev.dataTransfer.getData("text/html");
                    } else if(ev.dataTransfer.getData("text/plain")) {
                         dataVal = ev.dataTransfer.getData("text/plain");
                    }


                    ev.target.innerHTML += dataVal;
                }
            } catch(err) {
                console.error(err);
            }
        }


        function ondragendHandler(ev)
        {
            console.log("----------------ondragend - drag finished");
        }
    </script>

</body>
</html>
In this code we drag different elements, such as an image, text content, sub list or any html element. For this to work i updated the dragstartHandler() function to accept a second argument which is the type:
function dragstartHandler(ev, type)
        {
            console.log('----------------ondragstart - drag started');

            if(type == 'text/html') {
                ev.dataTransfer.setData(type, ev.target.outerHTML);
            } else {
                ev.dataTransfer.setData(type, ev.target.innerText);
            }

        }
Then inside the function body i check for the type. If the type is text/html then we retrieve the element html using ev.target.outerHTML. But if the type is text/plain then we retrieve the element text content using ev.target.innerText.
Also in the other function ondropHandler() i checked for the incoming datatype as follows:
if(ev.dataTransfer.getData("text/html")) {
       dataVal = ev.dataTransfer.getData("text/html");
 } else if(ev.dataTransfer.getData("text/plain")) {
      dataVal = ev.dataTransfer.getData("text/plain");
 }
Here because we are dealing with different types then we should check for the type first weather it’s html or plain text, thereby i called getData() with the appropriate type. Finally we append the data to the drop area using ev.target.innerHTML+=dataVal.
When running this example you will note that when you drag any element it’s get copied rather than moved, and the reason for this is that when i invoked setData() above i passed it the element html instead of the element id as in the first example so the source still in it’s place untouched.
You will also note that you can drag the element inside the drop area and also get copied, because the event listeners is already attached to the element so we will see below how to fix this in the move and copy section.
Moving & Copying
The default behavior of the Javascript drag and drop Api is to move the element to the drop area. But also the Api support copying elements using DataTransfer.dropEffect and DataTransfer.effectAllowed properties. The first property is more important while you can use the second property if you intend to permit some operations only.
The values that dataTransfer.dropEffect accept:
- move: The default behavior. Move the item to new location
- copy: copy the item to new location
- link: a link between the source element and the new element in new location
- none: drop not allowed
The values that dataTransfer.effectAllowed accept:
- none: no operation allowed
- copy: copy only allowed.
- move: move only allowed.
- link: link only allowed.
- copyMove: copy or move only allowed
- copyLink: copy or link only allowed
- linkMove: link or move only allowed
- all: allow all operations.
Example: drag and drop with moving elements
Modify the previous example a little bit as follows:
First: assign an id to each item:
<div style="width: 400px; float: left;">
         <ul>
            <li>
               <img id="img-node" width="200" src="https://images.unsplash.com/photo-1546587348-d12660c30c50?ixid=MnwxMjA3fDB8MHxzZWFyY2h8NHx8bmF0dXJhbHxlbnwwfHwwfHw%3D&ixlib=rb-1.2.1&w=1000&q=80" draggable="true" ondragstart="dragstartHandler(event, 'text/html')" ondrag="ondragHandler(event)" ondragend="ondragendHandler(event)" ondragenter="ondragenterHandler(event)" ondragleave="ondragleaveHandler(event)" />
            </li>
            <li>
                <p id="text-node" draggable="true" ondragstart="dragstartHandler(event, 'text/plain')">Lorem ipsum dolor sit amet, consectetur adipisicing elit, sed do eiusmod</p>
            </li>
            <li>
                <button id="button-node" type="button" draggable="true" ondragstart="dragstartHandler(event, 'text/html')">Button</button>
            </li>
            <li>
                <ul id="sublist-node" draggable="true" ondragstart="dragstartHandler(event, 'text/html')">
                    <li>Element 1</li>
                    <li>Element 2</li>
                    <li>Element 3</li>
                </ul>
            </li>
        </ul>
    </div>
Second: modify these functions as shown.
function dragstartHandler(ev, type)
        {
            console.log('----------------ondragstart - drag started');

            ev.dataTransfer.setData(type, ev.target.id);
            ev.dataTransfer.effectAllowed = "move";

        }
function ondragOverHandler(ev)
       {
           ev.preventDefault();
           console.log("-----------------------ondragover");

           ev.dataTransfer.dropEffect = 'move';
       }
function ondropHandler(ev)
        {
            ev.preventDefault();
            console.log("-----------------------ondrop");


            try {
                let dataVal;

                if(ev.target.id == "drop-zone") {
                    if(ev.dataTransfer.getData("text/html")) {
                         dataVal = ev.dataTransfer.getData("text/html");
                    } else if(ev.dataTransfer.getData("text/plain")) {
                         dataVal = ev.dataTransfer.getData("text/plain");
                    }

                    ev.target.appendChild(document.getElementById(dataVal));
                }
            } catch(err) {
                console.error(err);
            }
        }
As shown above i modified the dragstartHandler() function, modified the setData() function to take the element id.
Next to make the element to be moved to the drop location three things must be done:
- Set the effectAllowed=”move” in the ondragstart listener, this is done above in the dragstartHandler() function using ev.dataTransfer.effectAllowed=”move”. So here i am telling the application that the move operation only is allowed.
- Next set the dropEffect=”move” in either the ondragover or ondragenter event, so here in the ondragOverHandler() i set ev.dataTransfer.dropEffect=”move”.
- The last thing is to tell the ondrop listener to get the element using id and append it to the drop location. This is done on the ondropHandler() using ev.target.appendChild(document.getElementById(dataVal)).
Now if you run the script again the elements will be moved in target location.
Example: drag and drop with copying elements
We will use the same example again, but let’s make these updates:
– Update the dragstartHandler() update the effectAllowed as shown:
ev.dataTransfer.effectAllowed = "copy";
Or
ev.dataTransfer.effectAllowed = "copyMove";
– Update the ondragOver() update the dropEffect as shown:
ev.dataTransfer.dropEffect = 'copy';
-Make this update to ondropHandler()
let dataVal;
                let ele;

                if(ev.target.id == "drop-zone") {
                    if(ev.dataTransfer.getData("text/html")) {
                         dataVal = ev.dataTransfer.getData("text/html");
                    } else if(ev.dataTransfer.getData("text/plain")) {
                         dataVal = ev.dataTransfer.getData("text/plain");
                    }

                    ele = document.getElementById(dataVal);

                    if(ev.dataTransfer.dropEffect == 'move') {
                        ev.target.appendChild(ele);
                    } else if(ev.dataTransfer.dropEffect == 'copy') {
                        const cloned = ele.cloneNode(true);
                        cloned.setAttribute("id", ele.getAttribute("id") + "_cloned_" + (Math.floor(Math.random() * 10000)));
                        ev.target.appendChild(cloned);
                    }
                }
As shown above i updated the effectAllowed and dropEffect respectively. Then in the ondropHandler() i updated the code to check for dropEffect type. This has the benefit to work on both the move or copy.
Here i check for if the dropEffect=”move”, then it will append the child, otherwise it take a clone of the element using ele.cloneNode(true), then append the cloned node.
Now run the script again, you will see that the element is copied into the drop area.
Note that when copying the element to the drop location, you can still copy it inside the drop area. To disable this behavior we can simply remove the draggable and ondragstart attributes like so:
const cloned = ele.cloneNode(true);
cloned.removeAttribute('draggable');
cloned.removeAttribute('ondragstart');
cloned.setAttribute("id", ele.getAttribute("id") + "_cloned_" + (Math.floor(Math.random() * 10000)));
ev.target.appendChild(cloned);
Styling The Dragged Element
You can style the dragged element while selecting it with the mouse until getting dropped. Perhaps you saw something like this on draggable editors like form builders that work with drag and drop. Fortunately we can do this in the drag and drop events.
For example we can add a background color to the dragged element then remove it when dropped:
function dragstartHandler(ev, type)
        {
            console.log('----------------ondragstart - drag started');

            ev.target.style.backgroundColor = "red";

            ev.dataTransfer.setData(type, ev.target.id);
            ev.dataTransfer.effectAllowed = "copyMove";

        }


function ondragendHandler(ev)
        {
            console.log("----------------ondragend - drag finished");

            ev.target.style.backgroundColor = "";
        }
As you see here to style the element typically you will do this on the ondragstart and ondragend events. So i updated dragstartHandler() to set the background color using ev.target.style.backgroundColor=”red”. And also in the ondragendHandler() i removed the background color using ev.target.style.backgroundColor=””.
Also if the operation type is copy, you have to remove the background on the cloned element like so:
cloned.style.backgroundColor = "";
ev.target.appendChild(cloned);
Shopping Cart Example
In this example i demonstarte how to apply the javascript drag and drop technique and skills you learned in this article to make a droppable shopping carts. This is a simple interactive example to drag the products into shopping cart and storing them into session storage.
Take a look at this figure and the video demonstration below for the final output:

Source code
shopping_cart.html
<!DOCTYPE html>
<html lang="en">
<head>
    <meta charset="UTF-8">
    <title>Drag & Drop Shopping Cart</title>

    <link href="https://cdn.jsdelivr.net/npm/bootstrap@5.1.3/dist/css/bootstrap.min.css" type="text/css" rel="stylesheet" />

    <link rel="stylesheet" type="text/css" href="./style.css" />

    <script type="text/javascript" src="./scripts.js"></script>
</head>
<body>

<div class="container" style="margin-top: 20px">
    <p class="text-center">Drag a product from the left side into the shopping cart</p>
    <div class="row">
        <div class="col-3" id="products-section">

        </div>
        <div class="col-9" ondrop="ondropHandler(event)" ondragover="ondragOverHandler(event)" id="shopping-cart-zone">
            <div class="row">
                <div class="col-8">
                    <div class="text-center align-text-bottom" style="position: relative;border: 1px solid #e8e5e5;border-radius: 6px;">
                        <img src="./shopping_cart.png" style="width: 300px; margin-top: 130px">
                        <div id="quantity-badge" class="bouncing"></div>
                    </div>
                </div>
                <div class="col-4">
                    <h5>Cart Products</h5>
                    <div id="cart-products">

                    </div>
                </div>
            </div>
        </div>

    </div>
</div>

</body>
</html>
scripts.js
var products = [
{
id: 1,
title: 'Samsung Galaxy S10 SM-G973U1 - 128GB - Black (Unlocked) B Stock',
price: '230.00',
image: 'https://i.ebayimg.com/images/g/pN4AAOSwTKtczKGP/s-l500.jpg',
quantity: 10
},
{
id: 2,
title: 'Drone X Pro WIFI FPV 4K HD Camera 3 Battery Foldable Selfie RC Quadcopter Drone@',
price: '46.99',
image: 'https://i.ebayimg.com/images/g/VG4AAOSw2glfNRbq/s-l300.png',
quantity: 4
},
{
id: 3,
title: 'Bulova 98B181 Precisionist Chrono Date Rose Gold Rubber Wrist 47mm Mens Watch',
price: '695.00',
image: 'https://i.ebayimg.com/images/g/2coAAOSw3dVfLvsk/s-l300.jpg',
quantity: 7
},
{
id: 4,
title: 'Gamakatsu Octopus Circle GröÃe 8/0 Meeres- und Raubfischhaken\n',
price: '4.89',
image: 'https://i.ebayimg.com/images/g/pkAAAOSwbbVhenTp/s-l640.jpg',
quantity: 12
}
];
function dragstartHandler(ev)
{
console.log('----------------ondragstart - drag started');
if(parseInt(ev.target.getAttribute("data-quantity")) == 0) {
ev.dataTransfer.effectAllowed = "none";
ev.dataTransfer.dropEffect = "none";
alert("There is no enough items of this product");
return false;
} else {
ev.dataTransfer.effectAllowed = "copy";
ev.dataTransfer.dropEffect = "copy";
ev.target.style.backgroundColor = "red";
ev.dataTransfer.setData('text/html', ev.target.id);
}
}
function ondragOverHandler(ev)
{
ev.preventDefault();
console.log("-----------------------ondragover");
ev.dataTransfer.dropEffect = "copy";
}
function ondropHandler(ev)
{
ev.preventDefault();
console.log("-----------------------ondrop");
try {
let ele = document.getElementById(ev.dataTransfer.getData("text/html"));
if(ev.dataTransfer.dropEffect == 'copy') {
const cloned = ele.cloneNode(true);
cloned.removeAttribute("id");
cloned.style.backgroundColor = "";
cloned.style.display = "none";
document.getElementById("shopping-cart-zone").appendChild(cloned);
}
} catch(err) {
console.error(err);
}
}
function ondragendHandler(ev)
{
console.log("----------------ondragend - drag finished");
ev.target.style.backgroundColor = "";
let itemId = ev.target.getAttribute("id");
window.products.forEach((p) => {
if("product-" + p.id == itemId) {
if(p.quantity > 0) {
p.quantity -= 1;
// save products into some storage. For production environments you need to save the shopping cart into database like mysql, sqlserver,
// But for the purpose of this tutorial i will save the shopping cart into browser localstorage
saveProductToStorage(p.id);
} else {
p.quantity = 0 ;
ev.dataTransfer.effectAllowed = "none";
ev.dataTransfer.dropEffect = "none";
}
}
});
// Re-render products to display the correct amount
renderProducts(window.products);
}
function renderProducts(products)
{
document.getElementById("products-section").innerHTML = "";
products.forEach((product) => {
const outOfStockClass = product.quantity == 0 ? 'out-of-stock' : '';
const enableDraggable = product.quantity > 0 ? 'draggable="true"' : '';
document.getElementById("products-section").innerHTML += `
<div class="card mb-3 ${outOfStockClass}" style="max-width: 540px;" id="product-${product.id}" data-quantity="${product.quantity}" ${enableDraggable} ondragstart="dragstartHandler(event)" ondragend="ondragendHandler(event)">
<div class="row g-0">
<div class="col-md-4">
<img src="${product.image}" class="img-fluid rounded-start" style="width: 300px">
</div>
<div class="col-md-8">
<div class="card-body">
<h5 class="card-title">${product.title}</h5>
<p class="card-content">${product.quantity} items available</p>
<p class="card-text"><small class="text-muted">$${product.price}</small></p>
</div>
</div>
</div>
</div>
`;
});
}
function getShoppingFromStorage()
{
const cartData = window.sessionStorage.getItem("shopping_cart");
if(!cartData) {
return null;
}
return JSON.parse(cartData);
}
function saveProductToStorage(productId)
{
if(productId) {
const shoppingCart = getShoppingFromStorage();
const prod = window.products.find((i) => i.id == productId);
let data = [];
if (shoppingCart === null) {
data.push({pid: productId, amount: 1, unit_price: prod.price});
} else {
data = shoppingCart;
const checkProductIndex = data.findIndex((i) => i.pid == productId);
if (checkProductIndex >=0 && checkProductIndex !== undefined) {
data[checkProductIndex].amount = parseInt(data[checkProductIndex].amount) + 1;
} else {
data.push({pid: productId, amount: 1, unit_price: prod.price});
}
}
window.sessionStorage.setItem("shopping_cart", JSON.stringify(data));
displayTotalAmountInCart();
displayCartProducts();
}
}
function getCountAllProductsFromStorage()
{
const shoppingCart = getShoppingFromStorage();
let total = {count: 0, total_price: 0};
if(shoppingCart != null) {
const data = shoppingCart;
data.forEach((i) => {
total.count += i.amount;
total.total_price += i.amount * i.unit_price;
});
}
return total;
}
function removeFromCart(productId)
{
const shoppingCart = getShoppingFromStorage();
if(confirm("Are You Sure?")) {
if (shoppingCart != null) {
const removedProduct = shoppingCart.find(i => i.pid == productId);
window.products.forEach((prod) => {
if(prod.id == removedProduct.pid) {
prod.quantity = prod.quantity + removedProduct.amount;
}
});
const newData = shoppingCart.filter(i => i.pid != productId);
window.sessionStorage.setItem("shopping_cart", JSON.stringify(newData));
// re-render products
renderProducts(window.products);
displayTotalAmountInCart();
displayCartProducts();
}
}
return false;
}
function displayTotalAmountInCart()
{
const ele = document.getElementById("quantity-badge");
const totalProds = getCountAllProductsFromStorage();
if(totalProds.count > 0) {
ele.style.display = "block";
ele.innerHTML = "<div class='total-prods'>" + totalProds.count + " items</div>" +
"<div class='total-price'>$" + (totalProds.total_price).toFixed(1) + "</div>";
} else {
ele.style.display = "none";
ele.innerHTML = "";
}
}
function displayCartProducts()
{
const shoppingCart = getShoppingFromStorage();
if(shoppingCart != null && shoppingCart.length > 0) {
const data = shoppingCart;
let html = "<ul>";
data.forEach((i) => {
const findProd = window.products.find((prod) => prod.id == i.pid);
const totalPricePerProd = (i.amount * i.unit_price).toFixed(1);
html += `<li class="">
<img src="${findProd.image}" width="50" height="60" />
<span class="badge badge-primary">${i.amount}</span>
<span>×</span>
<span class="badge badge-primary">$${i.unit_price}</span>
<span>=</span>
<span class="badge badge-primary">$${totalPricePerProd}</span>
<div style="font-size: 10px">${findProd.title}</div>
<a href="javascript:void(0);" onclick="removeFromCart(${i.pid});">Remove</a>
</li>`
});
html += "</ul>";
document.getElementById("cart-products").innerHTML = html;
return;
}
document.getElementById("cart-products").innerHTML = "<p class='text-left text-muted'>no products</p>";
}
function isThereAvailableQuantity(prodId)
{
let isThereAvailableQuantity = true;
const findProduct = window.products.find(i => i.pid == prodId);
if(findProduct.quantity == 0) {
isThereAvailableQuantity = false;
} else {
isThereAvailableQuantity = true;
}
return isThereAvailableQuantity;
}
function resetProductsQuantity(products)
{
const shoppingCart = getShoppingFromStorage();
if(shoppingCart != null) {
products.forEach((product) => {
const productInCart = shoppingCart.find(i => i.pid == product.id);
if(productInCart != undefined) {
product.quantity = product.quantity >= productInCart.amount ? product.quantity - productInCart.amount : 0;
}
});
}
}
window.onload = (e) => {
resetProductsQuantity(products);
renderProducts(products);
displayTotalAmountInCart();
displayCartProducts();
}
style.css
#quantity-badge {
    width: 100px;
    height: 100px;
    background: red;
    border-radius: 50px;
    border: 6px dashed red;
    position: absolute;
    bottom: 33%;
    left: 39%;
    font-size: 22px;
    transition: all 0.5s;
    animation-duration: 2s;
    animation-iteration-count: infinite;
}

.bouncing {
    animation-name: bouncing;
    animation-timing-function: ease;
}
@keyframes bouncing {
    0%   { transform: scale(1,1)    translateY(0); }
    10%  { transform: scale(1.1,.9) translateY(0); }
    30%  { transform: scale(.9,1.1) translateY(-100px); }
    50%  { transform: scale(1,1)    translateY(0); }
    57%  { transform: scale(1,1)    translateY(-7px); }
    64%  { transform: scale(1,1)    translateY(0); }
    100% { transform: scale(1,1)    translateY(0); }
}

#quantity-badge .total-prods {
    line-height: 2;
}

#quantity-badge .total-price {
    font-size: 20px !important;
}

.card-title {
    font-size: 15px !important;
}

#cart-products ul li {
    border-bottom: 1px solid #ccc;
    padding-bottom: 5px;
    margin-bottom: 7px;
}

#cart-products ul li .badge {
    color: #fff !important;
    background: #f44646 !important;
    font-size: 10px;
}

#cart-products ul li a {
    font-size: 13px;
    color: red;
}

#products-section .card.out-of-stock {
    opacity: 0.4;
    cursor: no-drop;
}
Download the cart icon from here.
Download the source code repository


